Vesta Control Panel Installation On VPS / Dedicated Server
Vesta is one of the best free and opensource web hosting control panels. The Vesta development team is releasing the updates frequently and Vesta control panel supports NGINX. This is the reason why we recommend our customers to install this control panel for managing their websites on VPS and Dedicated Servers.
In few simple steps, you can install the Vesta control panel on your dedicated server or a virtual private server. Follow this tutorial carefully to install the free web hosting control panel on your server in few minutes.
1 Login to your server using the PuTTY software by SSH login. If you don’t have that software, download from here Download PuTTY.
2 Enter the username and IP address like [email protected]. Then click Open to open the terminal of your server.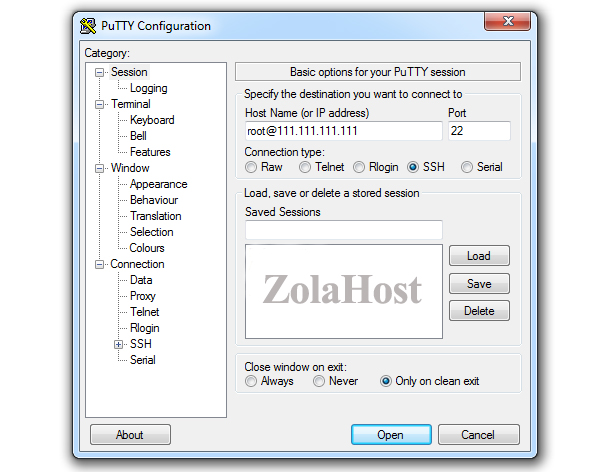
3 Press Yes to store your server’s host key on your PC.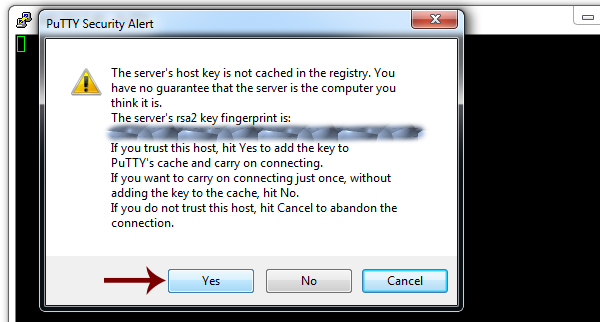
4 Terminal will ask the password for login to the server. You need to copy and paste the root password here. Normal shortcut key for paste (CTRL+V) won’t work on the terminal window. Press right click on the mouse to paste the password you have copied. Then press Enter to login.
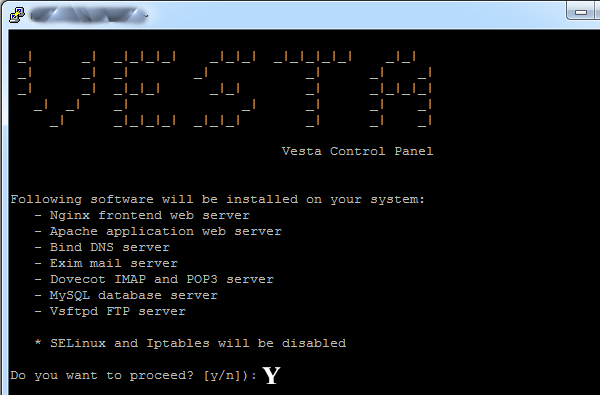
5 Copy and Paste the code given below to start the Vesta Control Panel installation on your server.wget http://vestacp.com/pub/vst-install.sh && bash vst-install.sh

6 Type Y and press Enter, if the installation asks something same like in the image given below. It will ask your email address after enters Y.Enter your main domain name in Hostname. Installation will start after press the Enter. Vesta installation will take up to 15 minutes to complete.
7 You will get the admin login details after completed the installation.