How To Install WordPress In VPS Vesta Control Panel
We are providing free Vesta Control Panel with our vps servers for managing websites easily. We have published this tutorial for installing the WordPress on the websites hosted by Vesta Control Panel. File manager is not available in Vesta is the drawback of this control panel. We suggest our customers to use explorer the free file manager application.
For Installing WordPress in Vesta, we need to add the domain name and create the database first.
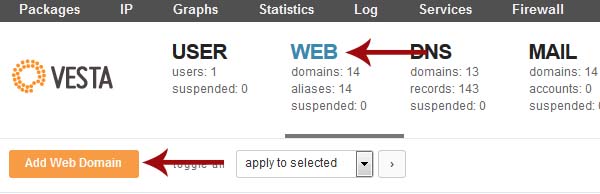
1 Click WEB and Add Web Domain for adding the domain on Vesta panel.
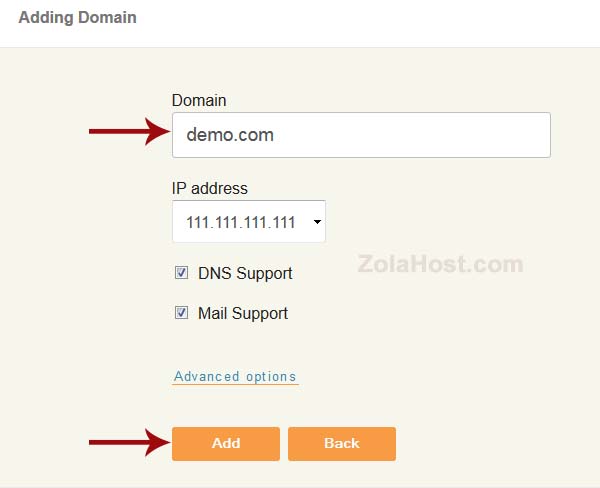
2 Type your domain name and click Add button to add your domain name.
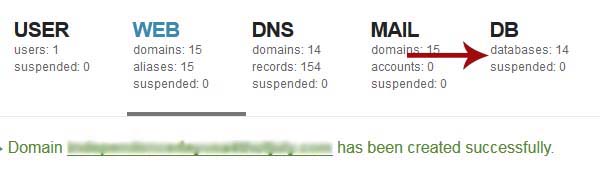
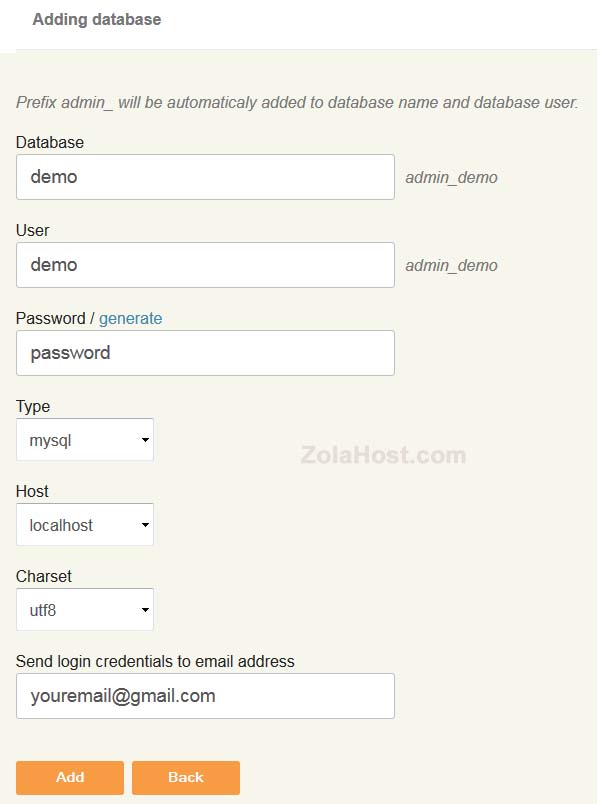
3 Proceed to create the database and database user after got the successful message.
4 For creating a database and database user, fill the database, user, password and email fields. The prefix admin_ will be automatically added to database name and database user. Click Add to complete this process. Note the database name and database user and password on a notepad for installation.
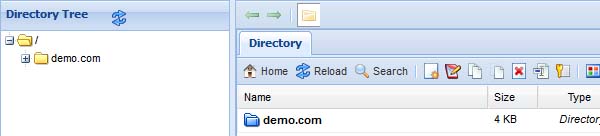
5 Login to the file manager for upload the WordPress. Open the domain’s folder and open the public_html folder.
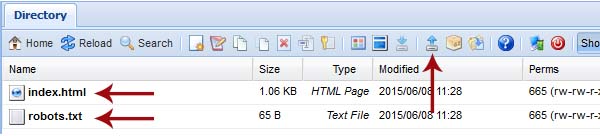
6 Delete the index.html & robots.txt files from public_html folder. Then click upload icon to upload the WordPress files.
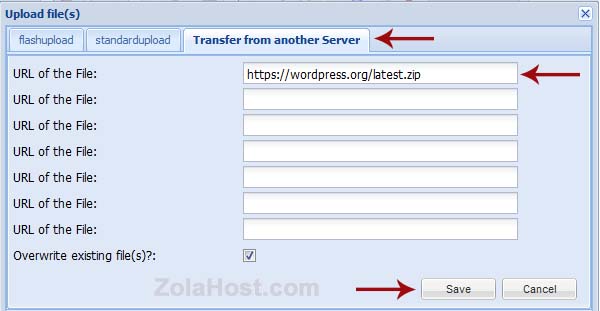
7 Choose the third tab Transfer From Another Server. Copy this url https://wordpress.org/latest.zip and press Save button to download WordPress. The download will be completed in few seconds.
8 Select latest.zip and click the extract icon to extract the WordPress files from that zip file. Files will be extracted into WordPress folder.

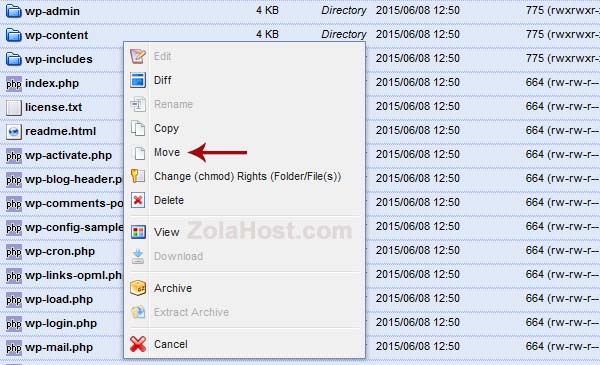
9 Open the wordpress folder. Select all files, then right click and click Move.
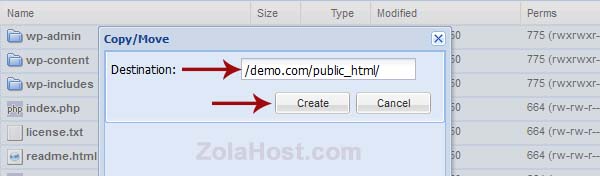
10 In destination, remove the wordpress and keep /yourdomain.com/public_html/. Click Create to move the files from wordpress folder to public_html folder.
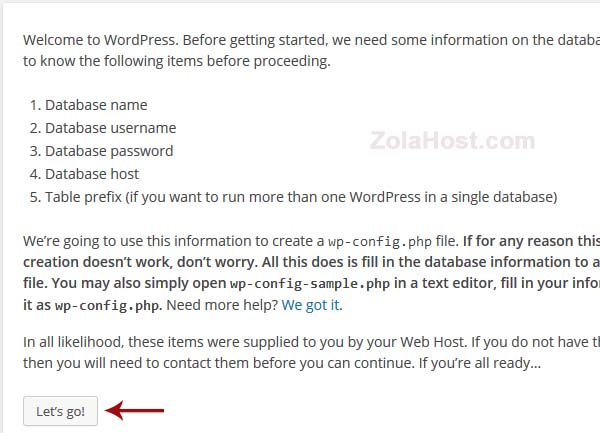
11 Visit your website in web browser for complete the installation. Click Let’s go!
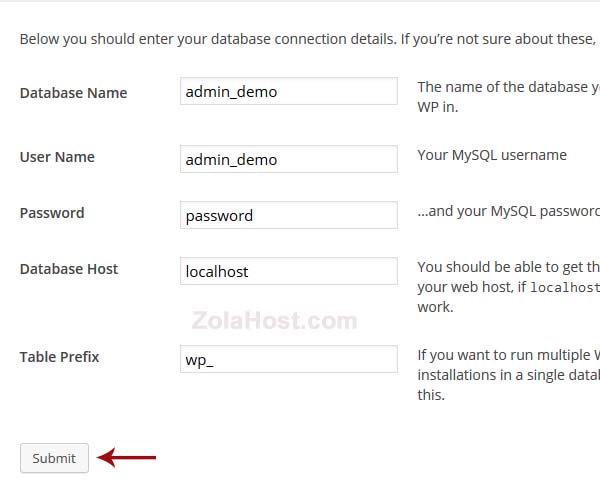
12 Fill the first three fields with database name, database user and password you have created already. Don’t change the default values of Database Host and Table Prefix. Click Submit.
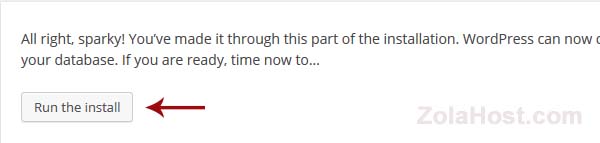
13 Click Run The Install.
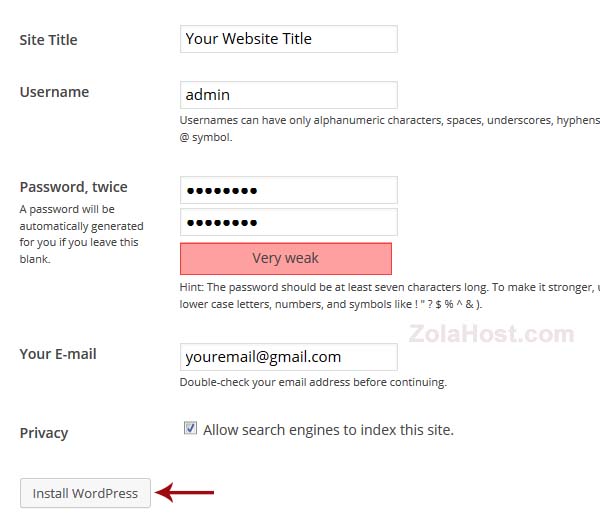
14 Fill the form and click Install WordPress to complete the installation.
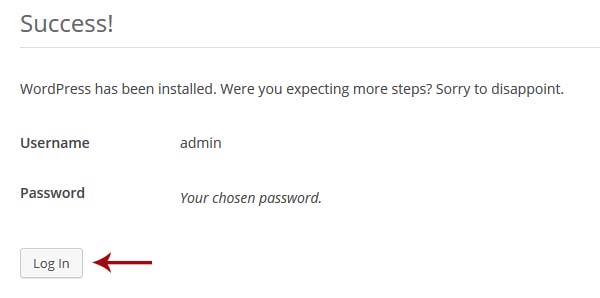
15 You will get a success message after the installation has completed.
Don’t forgot to delete the downloaded ZIP file and the WordPress folder.