How To Add A Custom Domain In Blogger
Nowadays lots of people are using the free blogs provided by blogger also know as one of the services offered by Google. These blogs’s URLs end with the blogspot name like .blogspot.com or .blogspot.in. If you have created a blog at blogger.com, your blog address is like yourname.blogspot.com or yourname.blogspot.in.
We can change our blog address like a professional website like yourdomain.com. There is an option available in blogger to setup our own domain name for our blogs. Let we check out how to integrate the ZolaHost domain into your Blogger blog.
Steps
Login to your ZolaHost account and Blogger account in two separate tabs, because we need to change some settings in at your ZolaHost and Blogger accounts in a same time.
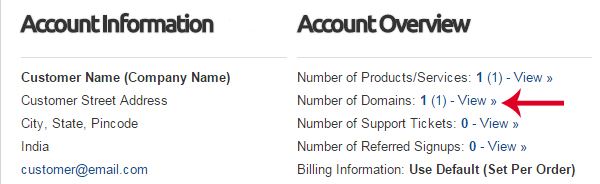
1 Click No OF Domains : View to view the list of your domains registered at ZolaHost.
2 Click Manage Domain which domain name you want to setup with blogger.

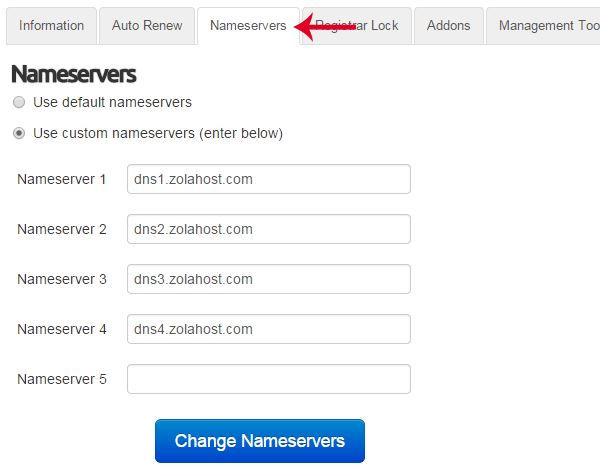
3 Click the Nameservers tab to insert the following nameserver values same like in this image. Then press Change Nameservers button to save the changes.
- dns1.zolahost.com
- dns2.zolahost.com
- dns3.zolahost.com
- dns4.zolahost.com
4 Click Management Tools —> Manage DNS for insert some DNS values. If Manage DNS option is not available, Click Addon and enable the DNS function.

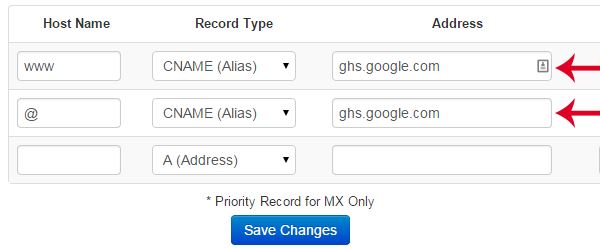
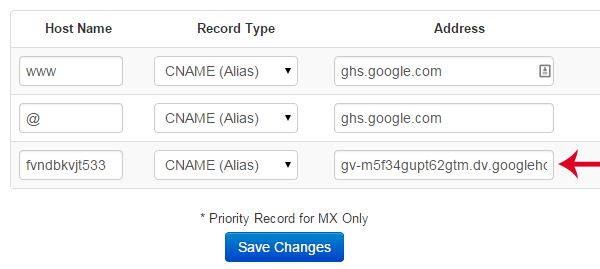
5 Insert the following DNS values same like in the image given below. Insert these values one by one and press Save Changes, because you can’t insert more values in a time.
- Host Name : www | Record Type : CNAME | Address : ghs.google.com
- Host Name : @ | Record Type : CNAME | Address : ghs.google.com
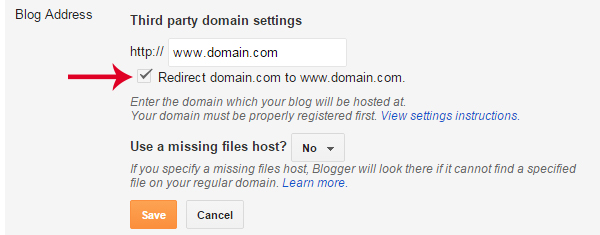
6 Find Publishing section at your Blog’s Settings page. Click Setup a 3rd party URL for your blog link for setup a domain name with your blog.
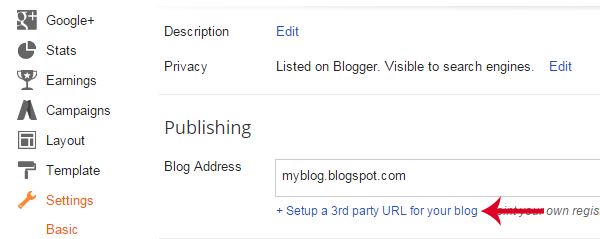
7 Enter your domain name with www and press Save. You will receive an error message and some settings for verify your domain ownership, because blogger need to verify you are the real owner of this domain name. You need to insert these values at ZolaHost DNS settings.
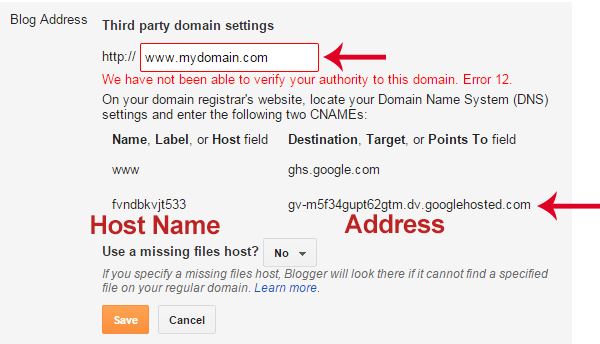
8 Insert and save the values provided by blogger to verify your domain ownership.
9 Save your domain on blogger after 10 minutes, because Blogger will be take few minutes for verify your domain ownership.
10 You have to do one more settings after the domain name got added on blogger successfully. Press Edit.

11 Enable Redirect function to redirect a domain without WWW to with WWW.