How To Create Custom Nameserver in GoDaddy
Domain owners want to create a namerserver with their domain name like a sub domain. Its called custom name server or private nameserver. We have published this tutorial for creating the custom nameservers in GoDaddy control panel. Just follow these steps to create a custom nameserver for your domain name in 2 minutes.
Steps
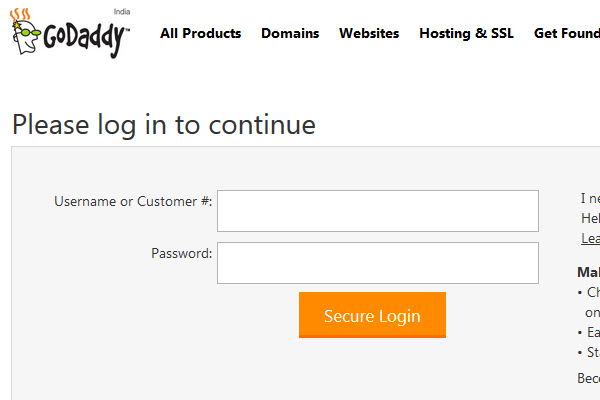
1 Login to your GoDaddy account.
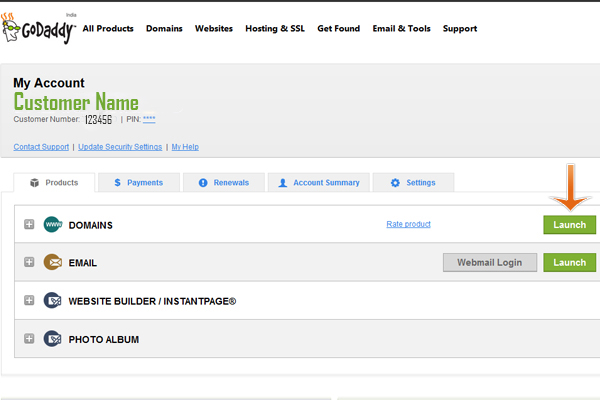
2 Click Launch to access the list of your domain names registered at GoDaddy.
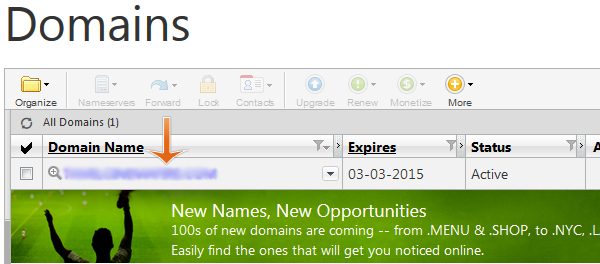
3 Click the domain name you want to create custom nameservers.
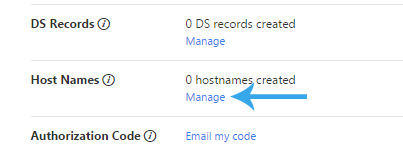
4 Scroll down the page and click Manage in Host Names.
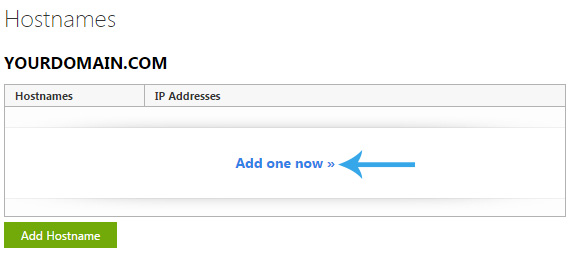
5 Click Add One Now to start adding your custom nameservers.
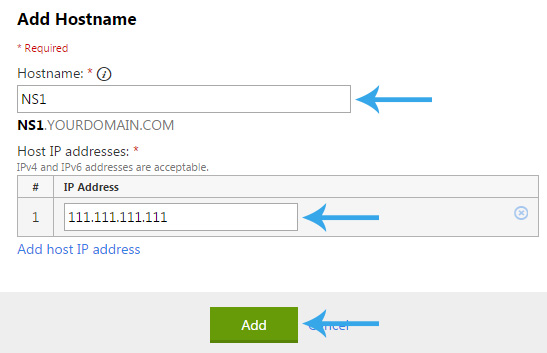
6 Type NS1 in Host Name and Type the IP Address provided by your hosting service provider. Press the Add button to add your first nameserver record.
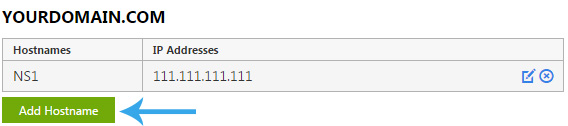
7 Click Add Host Name again because you need to create one more nameserver record for complete this action.
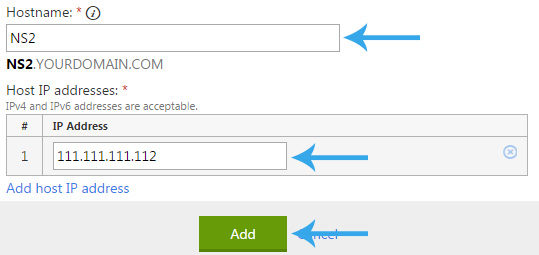
8 Type NS2 in Host Name and Type the 2nd IP Address provided by your hosting service provider. Enter the same IP Address again if single ip address only provided by your hosting provider.
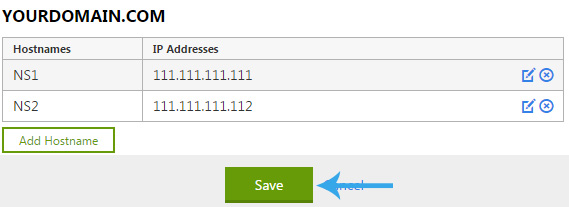
9 Click Save button to complete the process.