How to Deploy Node.js Projects in aaPanel (Step-by-Step Guide)
aaPanel makes it very easy to deploy Node.js applications. You can map your domain name to a Node project, manage processes, and install SSL certificates with just a few clicks.
Deploying a Node.js application in aaPanel involves two main steps:
-
Allowing the assigned project port in the firewall
-
Adding and configuring the Node project inside aaPanel
Let’s walk through the entire process.
1. Allow the Port in Firewall
1.Go to Security → Add Port Rule.
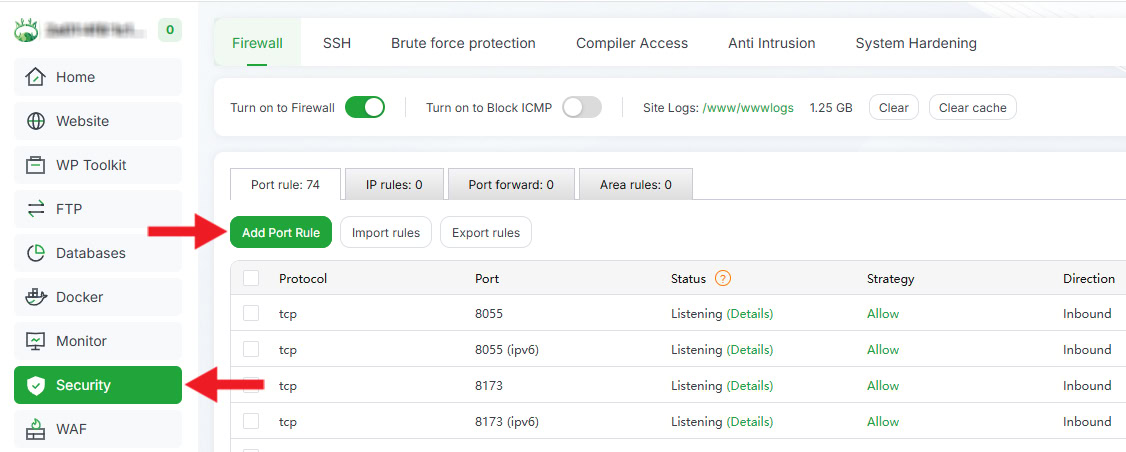
2.Enter the Port Number used by your Node.js project and add a Remark.
3.Click Confirm to allow the port for public access.

2. Add the Node Project in aaPanel
- Navigate to Website → Node Project → Add Node Project.
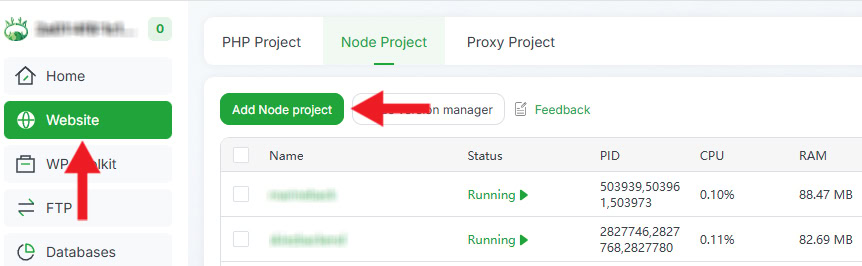
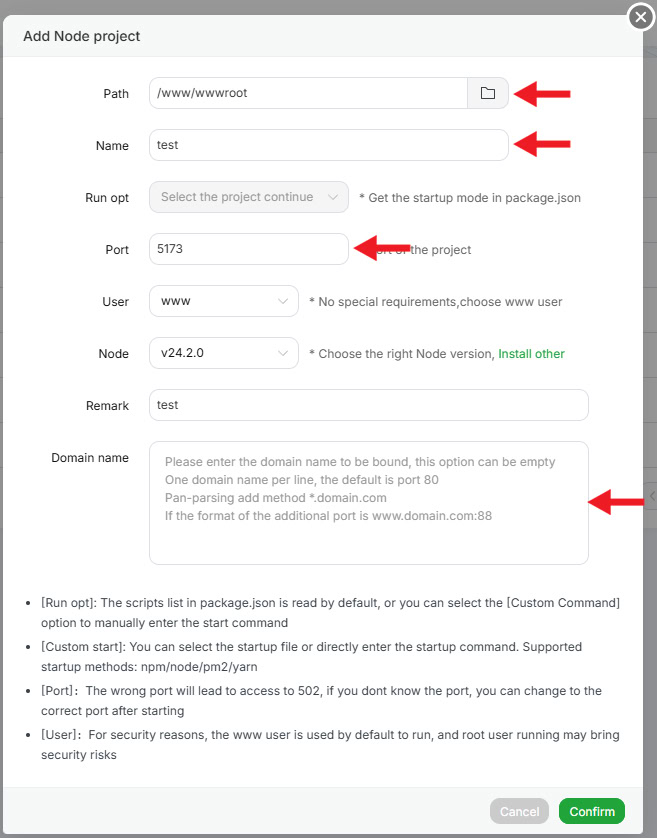
- Select your Project Path and fill in all required fields carefully. Click Confirm to add the project.
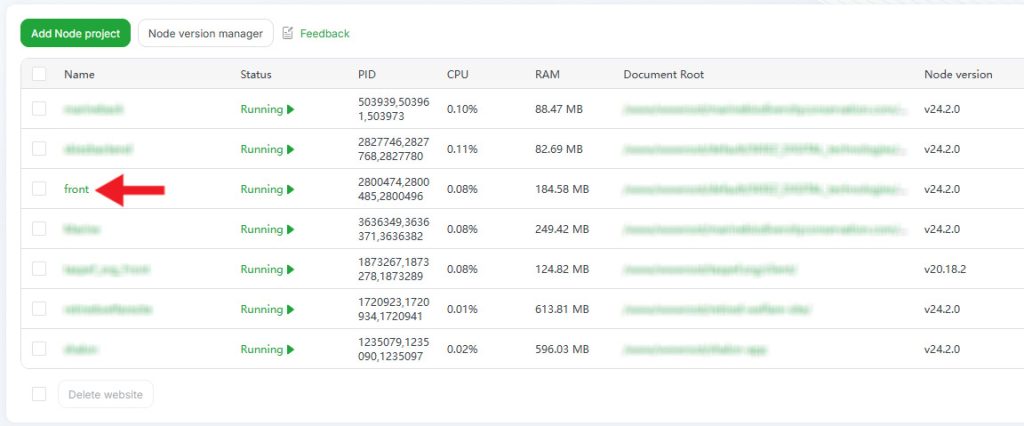
- Once added, the project will appear in the Node Projects list.
3. Open Project Settings
Click on the Project Name in the list to open the project settings panel, where you can manage modules, process status, and environment.
4. Install Node Modules
-
Go to the Module tab.
-
Click One-key Install to automatically install all dependencies.
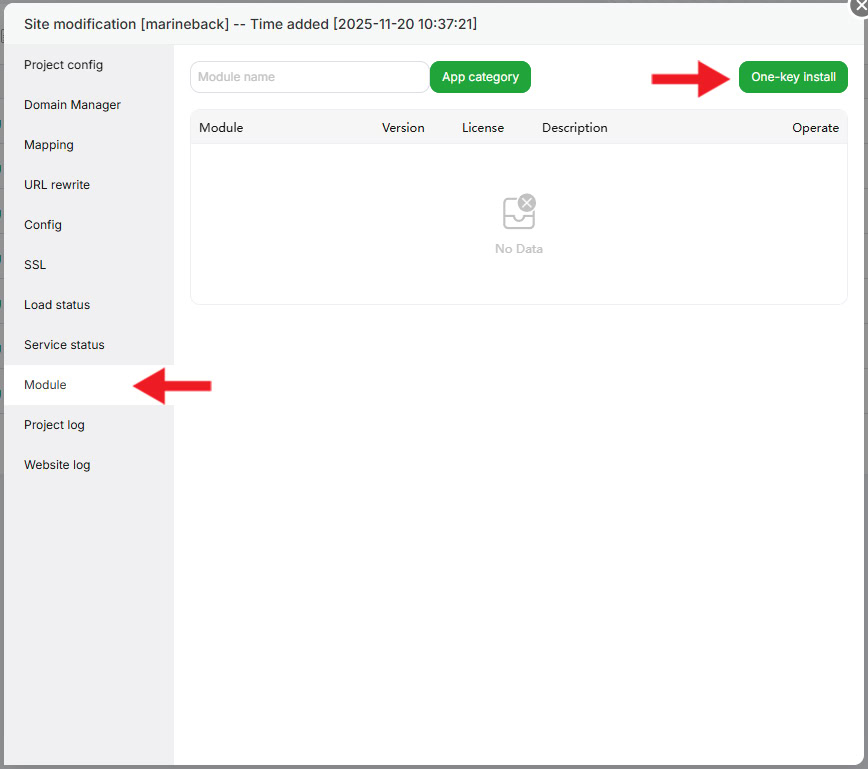
Note:
If the One-key Install button does not appear:
-
Delete the existing node_modules folder manually.
-
Reopen the Module tab.
-
Run One-key Install again.
5. Start or Restart the Project
-
Go to Service Status.
-
Restart or start the service.
-
Ensure the project shows Running Successfully.
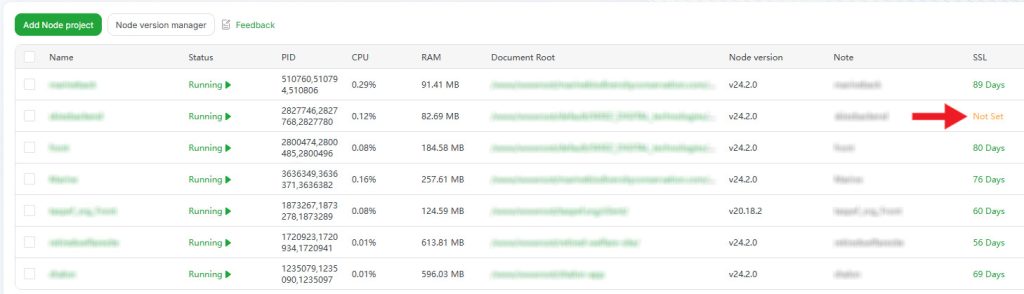
6. Install SSL Certificate
-
Close the project settings window and return to the Node Projects list.
-
Under the SSL section, click Not Set.
-
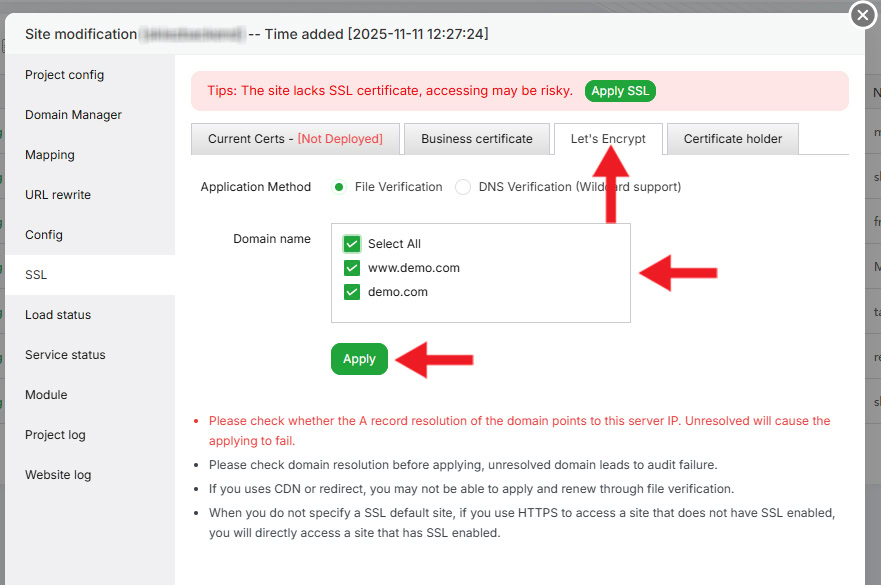
Choose Let’s Encrypt.
-
Select your Domain Name(s).
-
Click Apply to complete the SSL installation.
Final Step
Once all steps are completed successfully:
-
Your Node.js project will be live on your domain.
-
SSL will be installed and active.
If you face any issues, feel free to contact our technical team via WhatsApp. Our team will assist you in deploying your JavaScript and Node.js applications on aaPanel.